This variety of cabbage is close to early white cabbage but is a more delicate plant. Cauliflower requires careful care and balanced growing conditions. It can be grown using both sprouts and sowing in open soil. In our article, we will tell you in detail about growing cauliflower

Requirements for Growing Conditions for Cauliflower
Before you start growing a crop, you need to understand its characteristics.
- Ideally, it is better to grow the vegetable from seedlings. But you can combine the sowing of seeds. One batch can be planted in open soil, and the other under the seedling. The difference between sowings should be 10-15 days. For early harvest: in the soil – at the beginning of May, for sprouts – in the middle. For summer harvest: in the soil – from the middle of May, for seedlings – at the turn of June and July. Planting seedlings in the ground only after 30-35 days.
Take into account your climatic conditions. In an average climate, you can start sowing in the spring. Cabbage can grow at a temperature of +3 … +5 degrees.
- Soil for planting. The soil should be neutral or slightly acidic. If your site does not meet this – prepare it for the fall. In the fall, add a little lime. Use organic fertilizers in the spring. They should contain copper, boron, and molybdenum. It is these substances that mainly nourish the plant. Seeds should be planted in loosened soil.
- The ideal temperature for growth is +16-18 degrees. If the plant does not get heat – the cabbage will lose flavor and will be small. If the temperature is more than +25 degrees coupled with low humidity – it will stop the growth. The cabbage, in turn, will become easily destructible
- The vegetable should be grown in places where there is plenty of access to sunshine. Also, take care to reduce the influence of wind. It is also desirable to plant the plants not close together. Plus, your bed should not be near tall plants. Cauliflower loves light. Lack of light will cause it to tend to grow upward. This, in turn, will make the stems brittle. In addition, in the shade, the sprouts will grow small. And in very darkened areas and may not appear at all.
Also, keep these factors in mind. If you have a long sunny day in your area, the heads will appear earlier. But there is a disadvantage – they will not gain the strength they need. This will cause them to quickly produce shoots. If you have moderate daylight, the heads will mature later. They will be larger and denser.
When To Plant Cauliflower?
To get a harvest in summer and fall – you need to plant cabbage 3 times. At the same time, you should understand what kind of plant you are using.
- An early and hybrid variety. Sprouting – from March 10 to 30. Planting in the soil – in 30-60 days. Approximately from late April to mid-May.
- Medium-ripening varieties. Sprouts – from April 15 to May 15. Planting into the ground – after 35-40 days. Approximately from May 25 to June 15.
- Late varieties. Sprouting – May 20 to June 15. Planting into the soil – in 30-35 days. About the first half of July.
Consequently, seeds of early varieties for seedlings can be planted as early as the end of winter. About 45-50 days before transplanting in the ground. Seeds of medium-ripening varieties – will be suitable in 15 days. But late-ripening varieties – after 30 days.
How To Grow Cauliflower Seedlings?
If you want to get a rich harvest – we need to grow strong seedlings. To look at the process in detail – let’s break it down into several points.

Preparing the Soil for Seedlings
Substrate for seedlings can be purchased in specialized stores. Well, or prepare it with your own hands. If you want to make a nutrient layer yourself – prepare it from the fall. The main requirements for the soil – it must be friable and hold moisture well. Pay attention to the acidity – its values should be at pH 6-6.5. Recall that cabbage can die because of acidic soil. Here are a few options for soil composition as an example:
- Peat, sand, humus. The ratio is 1/1/10.
- Peat, wet sawdust, cow manure. Ratio – 4-5/1-1,5/1.
You can use absolutely any peat. This material absorbs water very well. It also allows air to circulate. Plus its dense structure is not subject to deformation. If you choose lowland peat – add sawdust to it (1 to 3).
Prepared soil should be steamed for 2-2.5 hours. Then add nitrogen fertilizer to it. You can use complex fertilizer at a ratio of 50 grams per 1 liter. As an alternative: ammonium nitrate – about 25 g. Or urea (20-25 g).
If you use top peat, it can be improved. To do this, add 400-450 grams of dolomite flour to it. Also if there are not enough micronutrients in the soil base – you can enrich it. A great option would be wood ash – it contains a lot of potassium. This element will help reduce acidity – which is important for cabbage. It also helps to increase the content of boron, phosphorus, and manganese.
Ready base, prepared in the fall, store until spring. Store it in a place where rats or mice can’t get to it.
Preparation of Cauliflower Seeds
Sort the seeds. Select only the largest and heaviest seeds. They will need to be pre-treated:
- Disinfection. It is necessary to protect the plant from harmful bacteria and viruses on the surface of the seeds. This is to ensure that they do not affect the health of the plant when planting. Put the selected seed in hot water for 17-20 minutes. The water temperature should be +/-50 degrees. An ideal dish for this would be a thermos.
- After disinfecting, cool the seeds in purified cold water. Then dry them with a paper towel.
- After a hot bath, the seeds can “close up” and will have difficulty germinating. To avoid this, you can feed the seeds with a solution. The basis for the solution can be the mineral fertilizer Nitrophoska. Use 1 teaspoon per 1 liter of water. Then immerse our seeds in the solution for 24 hours. This procedure will give strength for germination. If you have not disinfected your seeds – no big deal. They can also be artificially disinfected and nourished. In this case, Phytospirin will help. Make a solution based on it – and it will also kill viruses and bacteria, plus give a boost.
- When the seeds will give the first sprouts – they will need to harden. For this procedure, put the seeds in a cool place. The temperature there should be at +3-5 degrees. You can use the fridge to do this. The hardening time is 1 day. After that, the seed material for 24 hours take out into the heat. Then we send it to the refrigerator for another 24 hours.
Remember that strong and healthy seeds will allow you to grow excellent seedlings. Such seedlings will be resistant to weather changes and diseases.
Seed sowing
About the timing of sowing – we wrote above. Now let’s discuss the procedure:
- Container. The best option would be a cup made of self-degradable material (peat). But plastic ones can also be used. A diameter of at least 6-7 cm. As an alternative – you can use one large deep container. For example – a box, where you can plant the seeds.
Let’s draw your attention to the fact that the sprouts require free space. Therefore, your reference point when planting seedlings will be the diameter of the garden cup. Otherwise, with dense planting – you will have to deal with picking. And cauliflower is very afraid of this. You can kill the seedlings.
- Before planting, our soil base should be well heated. To do this, heat the soil in an oven or stove. The temperature should be 65-80 degrees. The time is 4-5 minutes. This procedure will get rid of harmful elements.
- Then, at the bottom of the planting container, lay drainage in the form of pebbles or expanded clay. After that, fill in the calcined soil.
- When the substrate is ready – make small pits on its surface. Their depth should not be more than 5 mm. Next, in each hole drop 2-3 seeds. After that, compact the soil. Towards the end, fill with a thin layer of sand. If you plant the seeds in one large container – do not be partial with the planting places. If the seedlings will be sown densely – when transplanting, you can damage the root system. Therefore, in a large container, plant in furrows. Each of the furrows should not be closer than 3-4 cm. And plant the seeds every 1-1,5 cm.
How To Take Care of Cauliflower Seedlings?
- Temperature. Until the first sprouts appeared temperature should be +/-20 degrees. When the plant is out of the ground reduce the temperature to +7-8 degrees. At the same time we should give more sunlight to the seedlings. Lowering the temperature is necessary so that the plant does not pull out. Otherwise going into growth will greatly weaken the roots. After 6-8 days, we change the temperature again. Now the regime will be divided into day and night. During the day – +16-18, and at night +7-10 degrees.
- Pruning. If all the seeds in the hole will give sprouts – it will be necessary to leave only the strongest sprout. The rest carefully cut at ground level. Under no circumstances do not pull! Trying to pull can damage the roots.
- Irrigation. You need to keep a balance at all times, as both excess and lack of moisture will hurt. To irrigate, use water that has settled for at least one day. The water temperature is room temperature. Watering – once every 7 days. Loosen the soil is not necessary, because the roots of the seedlings are close to the surface. After watering you can arrange an airing of the room.
- Feeding. This variety of cabbage is in great need of micronutrients such as boron and molybdenum. Therefore, in the process of growth, the sprouts will need to be nourished. When the first 2-3 leaves appear – spray a boron solution. Its composition 2 grams of boric acid per 1 liter of water. When 4-5 leaves appear – add a solution of molybdenum. It is 5 grams of molybdenum ammonium per 10 liters of water. 7-8 days before planting in the open ground – give up nitrogen fertilizers. But 2-3 days before transplanting – feed phosphorus and potassium. Make a solution: 3 grams of superphosphate and potassium chloride per 1000 ml of water. This will strengthen the plant against the effects of cold.
- Transplanting. For seedlings, we strongly recommend using garden cups. Since the root system of cabbage is very weak – manual picking can kill the seedlings. And transplanting in a cup, which will then decompose in the soil – will not be stressful for the plant. If transplanting will be from one common box – it will have to be transplanted 2 times. At the first leaves in separate pots, and then in the soil. After transferring the seedlings to real soil – the first time keep the temperature at +20-21 degrees. When the plant gets the hang of it – use the day and night mode. During the day – +17-18, at night +8-9 degrees.
- Hardening. To prepare the seedlings for life in the real earth – it is necessary to harden them. For 8-10 days before transplanting – periodically take the seedlings into the greenhouse or to the window. Time – for 2-3 hours. So the plant will begin to get used to fresh air. If you harden the seedlings – she will not be afraid of possible frosts, even to -4-5 degrees.
Site Preparation

The soil on the selected site should have a minimum acid content (pH 6.5-7.4). If the soil is highly acidic, prepare it from the fall. When cultivating add lime or dolomite flour. The first option is faster, but dolomite flour is more effective. It will saturate the soil with magnesium and calcium. It is also important to know what has grown before. For cauliflower, it is ideal if the plot has grown before:
- Various grains
- Plants of the legume family
- Various root crops
- Garlic, onions
- Cucumbers
It is not desirable that the predecessors are:
- Tomatoes
- Radishes and radishes
- Cabbage (any)
- Beets
If your plot previously grew such crops – it is better to plant cauliflower in 4-5 years.
In preparing the site you need to do the following:
- Fertilize the soil with organic and mineral fertilizers beforehand in the fall. Also not superfluous will be a boost in the form of phosphate (120-150 g) and potassium chloride (100-120 g). The dosage per square meter of soil.
- Planted cabbage suffers greatly from low temperatures. To protect the soil – cover it with a film or other garden material. It is better to choose specialized materials that let moisture and air and do not allow condensation to form. Also, covered soil prevents the growth of weeds. In addition to insulation – it will give you and protection from pests.
- In early spring it is also better to fertilize the soil beforehand. Each place under the plant should be additionally fertilized. One spoonful of nitrogen fertilizer and 700-900 grams of humus per cell. Other top dressing options can also be considered. Natural manure or a special topiary and compost mixture. Here we should take at the rate of 10-11 kg. per 1 sq.m. This recharge should be mixed with a fertile layer of soil. But it is not necessary to dig over the soil. Remember that cabbage needs a dense soil.
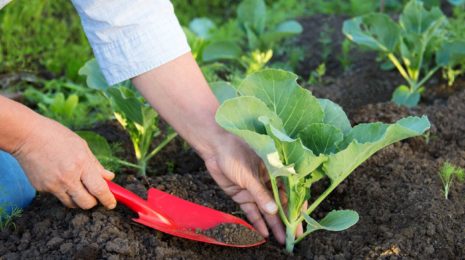
Transplanting Cauliflower Into the Ground

As we wrote above – cauliflower can be planted sprouts or directly. With the first option transplanting takes 47-50 days. The main thing is to monitor the timing, so that the seedlings do not overgrow. If you delay with transplanting, the seedlings will lose their leaves. As a result, a loose and small sprout will appear. If you see that the seedlings have already formed 4 strong leaves – you can transplant. If you plan to directly plant the seeds in real soil – the seeds need to be prepared. There is no difference in the treatment of seeds for seedlings or for soil. We wrote about it above.
Note that planting in real soil should take place on a warm and cloudy day. In this case, the type of planting material (seedlings or seeds) does not play a role.
- On the plot, planting should be done in rows. The distance between the rows should not be less than half a meter. Planting is carried out in wells, which are made not more often than 1 every 30 cm.
- Plunge the seedlings into the hole up to the leaves. Then bury the soil and slightly compact it. After that, carry out watering. If you have not prepared the soil beforehand, then each nest should be fertilized. We add there 20-30 grams of ash and mix it with soil and water. The volume of watering is one liter per nest.
- If the planting period is in early spring – it is necessary to insulate the beds. We cover our sprouts with a special garden cloth. This will protect the seedlings from frosts + shelter them from pests.
We also recommend making homemade caps for each plant. Plastic bottles with a capacity of 1.5 liters or more are ideal for this. Cut the bottle with a reserve for the size of the plant, focusing on the top part. Then cover the seedling by sinking the bottle slightly into the ground. Then screw the lid on. This will give each plant protection. Once a day, you can unscrew the caps to let in fresh air.
Сauliflower Plant Care
Cauliflower is more fastidious than its other counterparts. But the list of activities is very similar. The main difference is that everything must be done more carefully and carefully.
Ground handling

The first time after planting the seedlings in the ground – it is necessary to water twice a week. The volume of watering is 7-8 liters per 1 square meter. When the seedlings settle down on the ground – you can water once a week. Also on the issue of watering, look back on the weather. If it is rainy weather – you can not water. If it is dry – water more frequently, so the soil did not form a dry crust. It is best to water in the evening. Water should be warm. Remember that watering should not be abundant. If there is too much moisture in the ground, the maturation of the cabbage will slow down.
If we talk about loosening the soil, it is almost not necessary. The roots of the vegetable are close to the surface. You can occasionally carry out loosening, but only after rain. In parallel, you can remove weeds. Dip the tool into the ground no more than 7-8 cm.
Since the root system is close to the surface of the earth – carry out the plant dip. It would also be a good idea to carry out mulching. Peat or any other material will be suitable for this.
Shading
The effect of the sun on cauliflower is great. Too much sun will spoil the head. As you see the first inflorescences appear, cover them. You can create shade by using the leaves of the plant. Here are a few options:
- Slightly break up the leaves to form a tent on top
- Tie the leaves together with improvised materials, making a tent over the head
If you miss this point, your cauliflower will lose its appearance. Direct sunlight will cause it to turn yellow and cause dark spots to appear.
Feeding Cauliflower
If your goal is a great crop, you can’t do without additional fertilization. It should be done three times during plant formation. Here is a sample scheme:
- The first feeding is between day 10 and 20 after planting. For this we will need a solution of cowpea. Approximately 500 ml of liquid cowpea should be used per bucket of water. In the same add a tablespoon of fertilizer containing boron and molybdenum. Subsequently, all poured directly under the cabbage root. Consumption is 500 ml. per 1 head.
- Two weeks later, repeat the procedure, but slightly improving the solution. For this purpose, we add to it 15-20 grams. Christine. The dose of feeding increases to 1 liter.
- In 14 days we can make the second feeding. Dilute liquid cowpea in the ratio of 1 to 8. Add 20-25 grams of potassium chloride, the same amount of boric acid, 40-45 grams of superphosphate and 30-35 grams of ammonium nitrate per bucket of solution. Mineral fertilizers can serve as an alternative. Nitrophoska solution – two tablespoons per bucket of water. Consumption is 7-8 liters per square meter of area.
As soon as the heads start to form actively – you need to stop using nitrogen fertilizers. This is done so that harmful substances do not accumulate in them. At the same time, you can use a different composition of fertilizer. It consists of 1 gram of boric acid and one tablespoon of superphosphate extract. Also you need to add there 1 teaspoon of calamagnesia. All this should be dissolved in 10 liters of water and the plants should be sprayed.
Control of Pests and Diseases
Here is a list of the most dangerous diseases for cauliflower:
- Alternaria. This is a fungus that affects the leaves of the plant. As a result of its effects – the cabbage leaf is covered with spots. The spots can have different colors, but most often they are black or dark brown. After infestation, the cabbage leaf dies. The development of the disease is promoted by high humidity and temperature of +32-35 degrees. It is possible to avoid infection by treating the seed material with Planriz. And to treat the infected plant, copper-containing medicines will be suitable: copper sulfate, bordeaux liquid and colloidal sulfur.
- Kila. This disease affects the root system. New growths appear on the roots, which block nutrition from the soil. Because of this, the plant gradually dies. This disease develops in soils with high acidity. To avoid infection, add quicklime to the nests before planting. If a living plant is infected – you need to arrange an additional fertilizer. Make a solution of dolomite flour and water. The ratio is 200 grams per 10 liters. Pour the composition directly under the root. If you find Kila on the plot – refuse to grow cabbage. You will have to do it for 6 to 8 years.
- Ring spot. Another type of fungus. The disease appears when there is a lot of moisture. The disease looks like black dots, which affect both leaves and stem. Subsequently, the dots grow to 2-3 cm, additionally creating a ring of lesions around. Because of this, the plant turns yellow and dries out. It is for the prevention of this ailment that we conduct seed disinfection. For treatment, the vegetable should be treated with fungicides. At the end of the season – thoroughly rid the plot of diseased plants.
- Slimy bacteriosis. It is also a consequence of excessive moisture in both the air and the ground. As a result, watery, oily spots appear on the leaves and stem. Further, the damaged areas begin to rot and exude an unpleasant odor. If there is rainy weather – the disease quickly develops. To avoid infection – in the spring period it is necessary to treat the plant. 0.4% colloidal sulfur suspension is excellent. Affected areas can be removed. Cut them out with taking a part of the healthy plant. Also in the autumn, sick plants should be completely removed from the bed.
- Vascular bacteriosis. Another fungus that appears with excess moisture. Due to the fact that the soil is constantly moist – spots appear on the parts adjacent to the ground. When the disease is neglected – the leaves turn yellow and the fruit turns black. If the disease affects a young plant – it will not grow a head. To prevent the disease, it is necessary to disinfect the soil and seeds. The living plant should be treated with Planriz and Trichodermin.
- Fusariosis. Another fungal ailment that causes leaves to wilt. The disease causes the cabbage leaf to change color. It begins to turn yellow, a pigmented rash falls out, and the leaf veins turn black. At the same time, the cabbage head also suffers. To combat the disease, you need to make a solution of Fondazole. For prevention, water with Phytosporin-M.
- Black leg. This disease is characteristic of young seedlings. Blackness appears on the stems of seedlings. It also occurs due to an abundance of moisture. As a result of the disease, seedlings die. A solution of manganese solution can be used to combat it. You can also disinfect the soil. For this purpose, steam treatment of the soil or sprinkling with a light formalin solution is suitable. Affected seedlings must be removed.
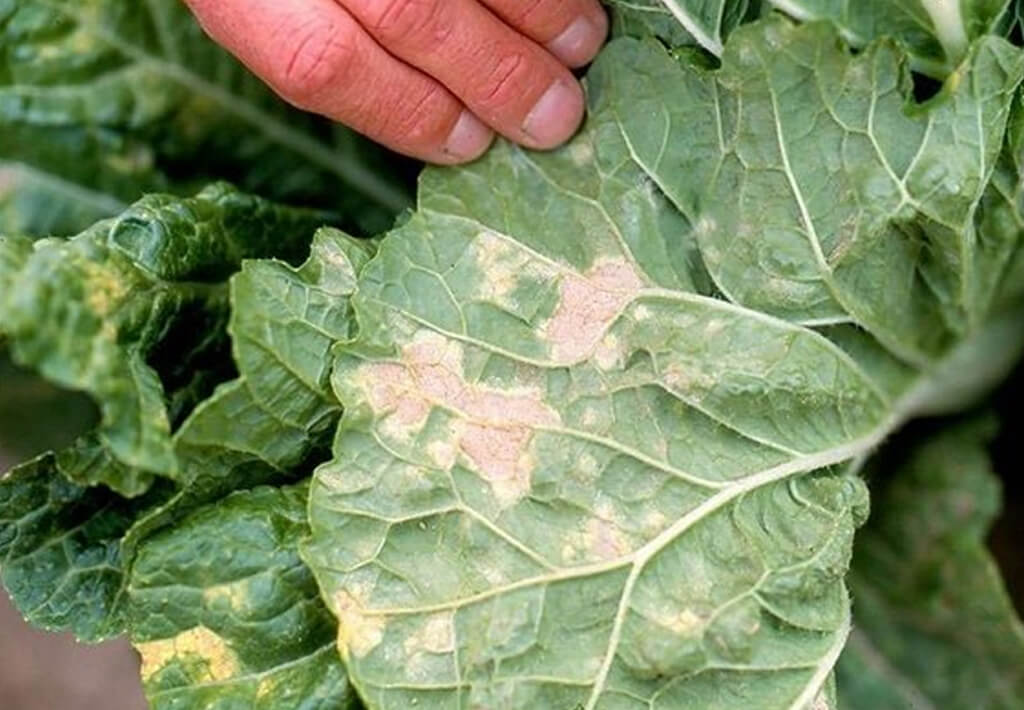
- Peronosporosis. Disease caused by excess water in the soil. As a rule affects only the part of the plant in contact with the ground. It can be identified by depressions on the leaves. Subsequently, the lower part of the leaf turns grey, and the leaf dies. For preventive purposes, soil and seeds should be disinfected before planting. The living plant is treated with fungicide.
- Mosaic. This disease has a viral origin. This virus appears in the early stages of plant development after planting. The veins on the leaves begin to lighten and form a border around them. As a result, the growth of the cabbage leaf is blocked and it becomes severely deformed, subsequently dying. The cabbage head also does not develop and remains small.
Infestation of the vegetable is caused by insects (aphids). Cruciferous plants are also carriers. It is impossible to cure diseased cabbage. It is better to remove it from the plot at once.
Let’s also look at the effects of various insects:
- Crucifer fleas. These are small bugs that eat almost the entire plant. They are especially dangerous in the early period of formation. To fight them, planted seedlings should be treated with Trichlormetaphos solution. It is necessary to carry out 2 procedures with an interval of 8-10 days. This pest does not like the garlic smell and the smell of tomatoes. You can surround cabbage beds with these plants.
- Fly. The danger is carried by the larvae of this insect. It lays them both in the ground and on the plant. After 10-14 days, the larvae begin to hatch and eat the plant. They are especially dangerous to emerging plants. Flies hate the smell of celery. Therefore, it can be planted near cabbage. You can prevent this by treating the soil in the bed. It is necessary to use 0.2% solution of Karbofos. The consumption is 250-300 ml per bush. Water once a week.
- Aphids. One of the most dangerous insects. It simply sucks the juices out of the cabbage. In doing so, it can infect the vegetable with viral or fungal diseases. For prevention – in the fall, completely clear the area of unnecessary plants and weeds. Aphids do not like the smell of tomato – they can be planted nearby. You can also treat cabbage with specialized infusions from agricultural stores. If there are a lot of aphids – use insecticides.
- Caterpillars. Also quite dangerous insects. They eat not only the leaves, but can also gnaw on the cabbage. To combat them, a 0.5 solution of Entobacterin-Z is excellent. Remove the caterpillars themselves from the plant by hand, and destroy their breeding sites.
- Slugs. They are not so dangerous, but still they also should not be allowed near the vegetable. To do this, spread ash or lime between the rows of plants.
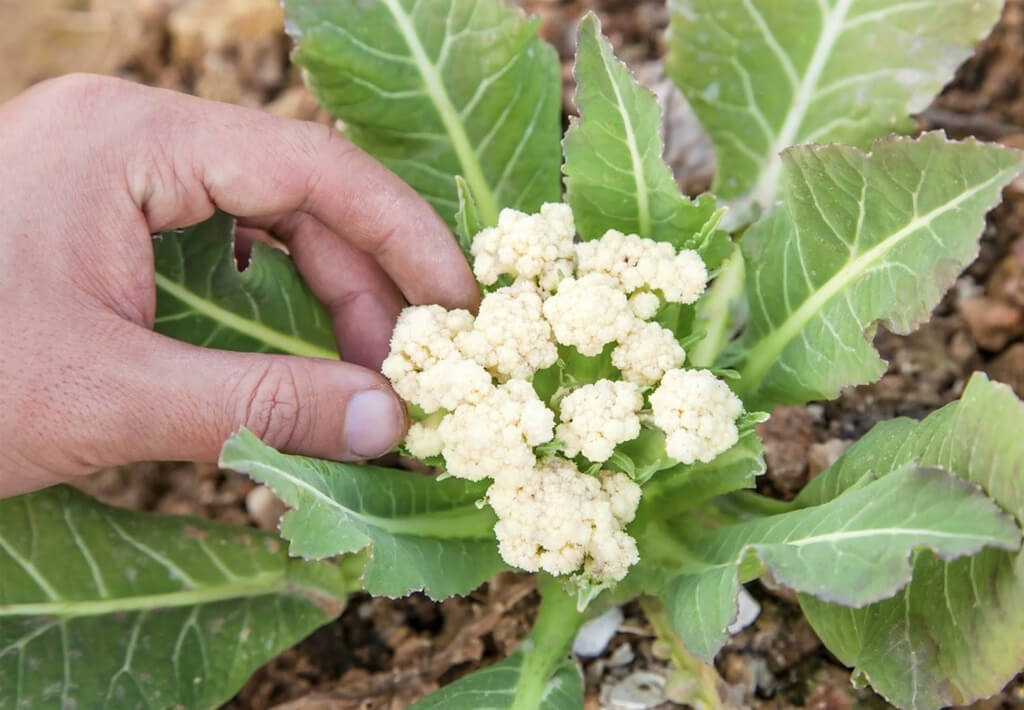
When and How To Harvest?

To do this, you must carefully study the variety of cabbage that you grow. All information is usually listed on the seed package. In general, there are some signs that tell you that the cabbage is ripe:
- The head is 9-12 cm in diameter
- Weight from 300 grams to 1.2 kg
In doing so, remember what type of maturation you have chosen to sow:
- Early varieties – 65-100 days
- Medium-ripening – 110-135 days
- Late – 4,5-5 months
Recall that you need to keep a close eye on how the cauliflower ripens. Overripe fruit loses density and begins to disintegrate and blossom. And the ripe cauliflower should be cut together with a few leaves, 2-2.5 cm below them on the stem. It is best to harvest in the morning. If the fall harvest in frosts – from 10 to 13 hours.
If the cauliflower still has side shoots, leave them, but only the strongest ones. Then new inflorescences will emerge from them.
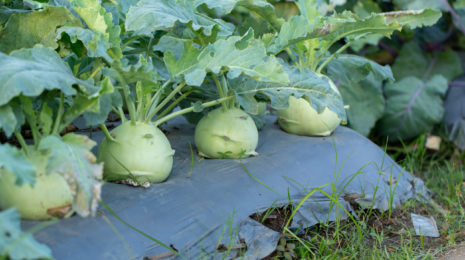
If you want to store the sprout for a long time, it is better to dig it up with the roots. In this case you do not need to cut anything. The dug up vegetable should be stored in a dry and cool place, preferably not slightly wet sand. It is also possible to hang such a cabbage upside down.
Some varieties do not have time to mature before frost. To do this, you have to finish it off. Here are the instructions:
- Choose a cool and dry room (basement). Bring there from the plot how many crates of soil.
- Water the cabbage on the plot. After 2-3 days, dig up the vegetable with the roots and soil. Put it in the basement.
- Dug out the vegetable planted in boxes with soil, drowning on the leaves
- Humidify the air and keep the humidity at 90-95%. The temperature regime is 0-5 degrees. Provide ventilation.
So in the basement the cabbage can grow for another 2 months. And you can please yourself with fresh cauliflower even in winter.
Cauliflower Storage Rules
Here are a few rules:
- Store the cut shoots without access to the sun, otherwise they will begin to turn yellow and spoil.
- Store in the basement for no more than 2-3 months. Storage containers can be made of plastic or wood. Can be closed with a lid or film. The storage temperature is 0-1 degrees with a humidity of 90-95%.
- If there is no cellar – the cabbage can be frozen. In the freezer it can easily keep 12 months. For freezing, take apart the cabbage into florets, washed in running water and dried. Then everything is packed in cling film and put in the freezer.
- Approximately 1 month cabbage is stored in suspension. The main thing is that it has not come into contact with anyone.
In the end, let’s say that cauliflower, though a capricious vegetable when growing, but it is very useful. So if you carefully follow our instructions from the time of sowing the seeds to harvest – you will have a healthy and tasty product almost the whole year.